Article
Data Cloud Breaks $1B ARR Milestone in Q1 FY26: What...


In my previous post we discussed what Salesforce Flows are, how to use the Flow Builder, and why you (and everyone who administers a Salesforce Org) should learn how to use them. Now that we’ve learnt the basics, it’s time to dive deeper and start building your first Flow! Let’s follow the business case below, and build a solution using Flows.
If you plan to play along please do so in a Developer Org or Sandbox!
Business Case: Your sales team have recently started using Salesforce to manage their pipeline – and they’re loving it! The only negative feedback you’ve received so far, is that sometimes they want to send a mass email to all Contacts related to a single Account, and having to send emails one by one is wasting precious time.
Solution: You can create a Flow that will be triggered from an Account record and send an email to all the Contacts that are related to that particular Account. Users will simply click the button and the Flow starts – nice and easy!
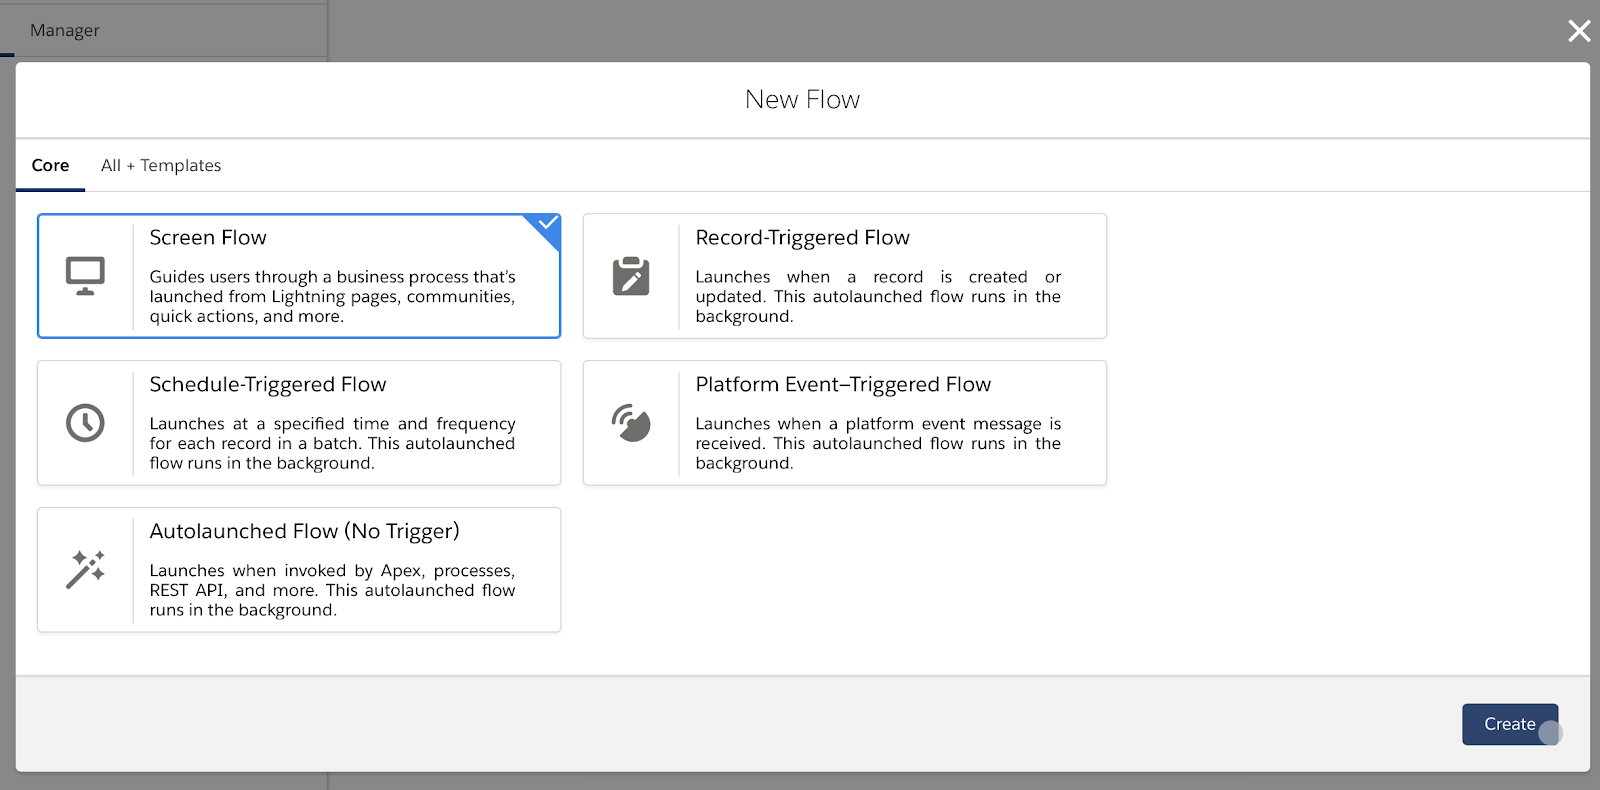
First head to Setup > Process Automation > Flows (search for “Flow” in Quick Find). Select “Flows”, then click the “New Flow” button.

Select the “Screen Flow” option and click “Create”.
Next, select “Freeform”.
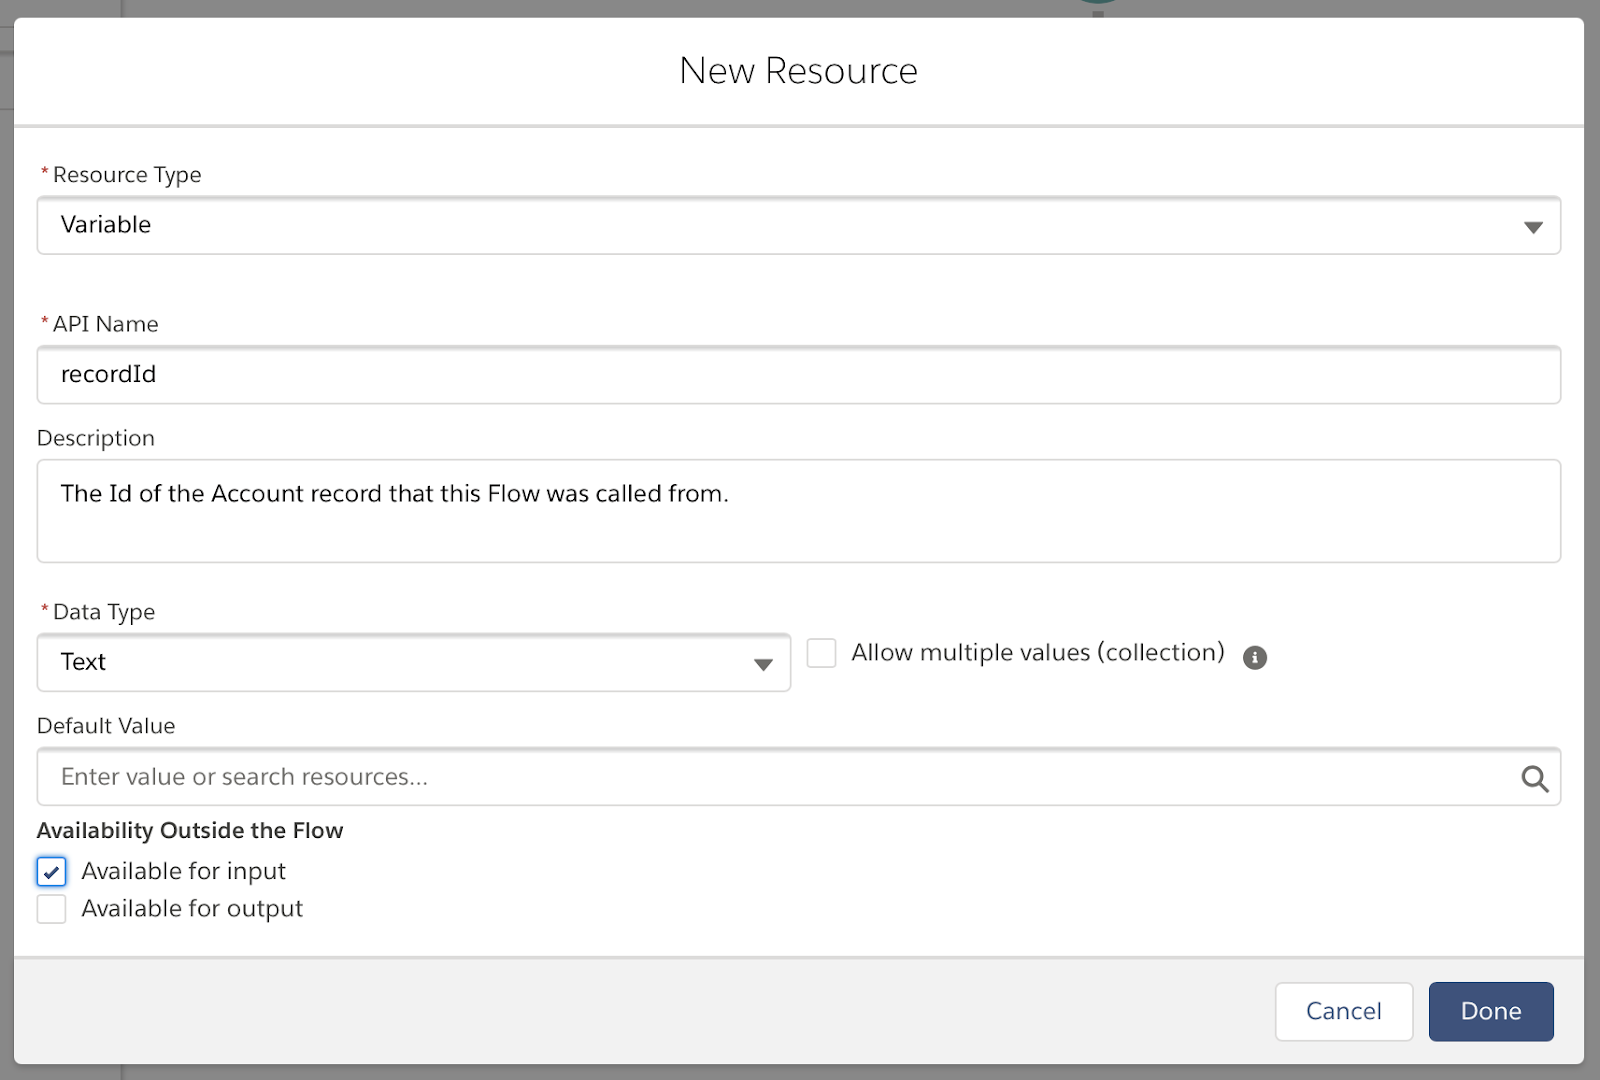
It’s now time to create your variables. Variables are resources that store data for use inside the Flow.
All the variables you’ll need are detailed below. To create a variable, click “New Resource” under the Manager tab in your Toolbox.
recordId: This needs to be a Text Variable that can receive text from outside the Flow (to do this we need to enable Available for Input.
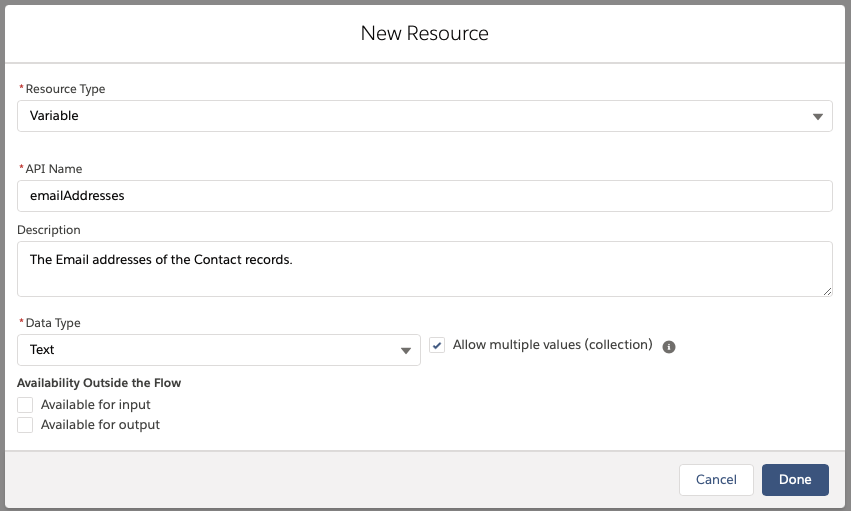
emailAddresses: This needs to be a Text Variable that can hold multiple values (a collection).
Now that you’ve got your resources built, it’s time to use them in your Flow. The first thing you need to do is create the email itself; we’ll allow the User to input the content through a Screen element. To do this, move over to the Elements tab and drag a Screen element onto the canvas. In the Screen Properties panel, set the Label to “Draft Email”, and press the Tab key on your keyboard to automatically populate the API Name (it should set itself to “Draft_Email”). Set the Description to “Allow the User to write their email.”
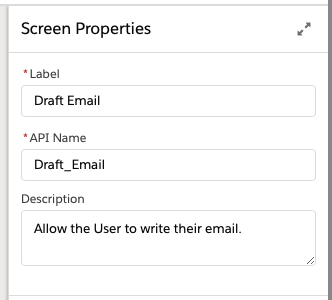
Next, you’ll drag a Text component and a Long Text Area component onto the screen canvas. Label them “Subject” and “Body”. Your screen should look like the image below.
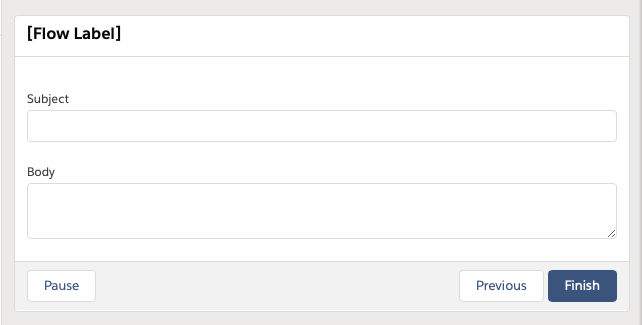
Once you’re finished, click “Done” at the bottom of the screen.
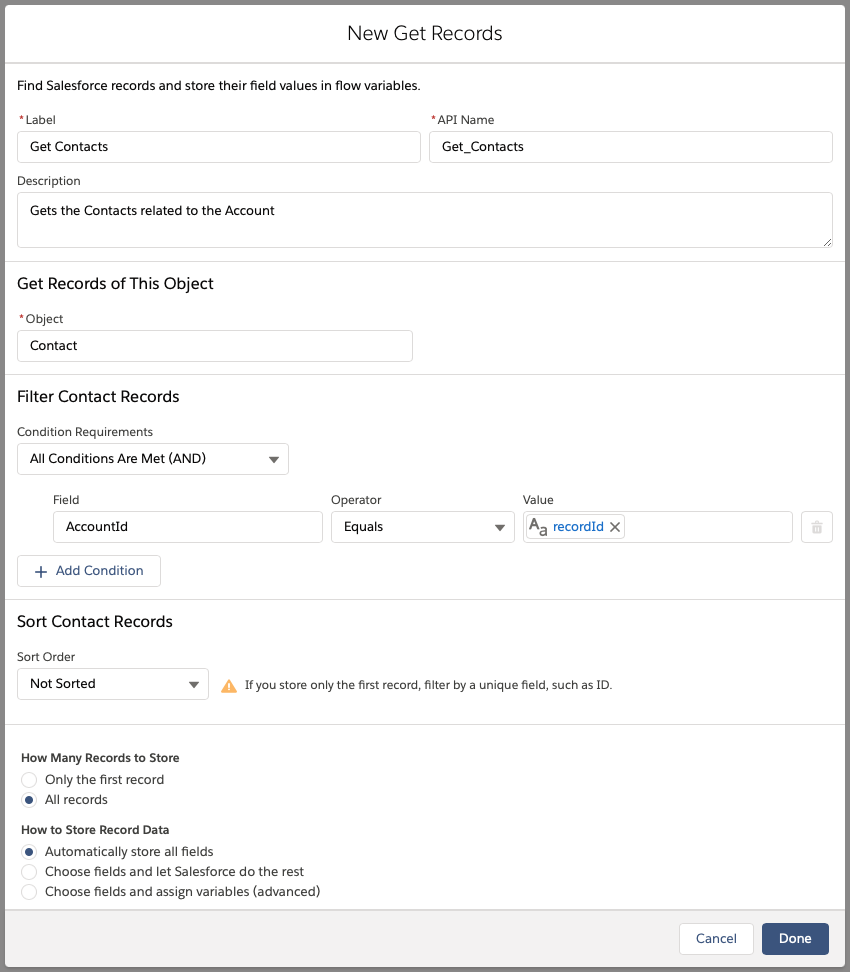
We then need to find all the Contacts related to the Account and store them in the Collection Variable that Salesforce will automatically create. To do this, drag a Get Records element onto the canvas and configure it as shown below. Once you’re finished, click “Done”.
Label: Get Contacts
API Name: Get_Contacts
Description: Gets the Contacts related to the Account.
Object: Contact
Conditions: AccountId Equals recordId
How Many Record to Store: All records
How to Store Record Data: Automatically store all fields
In the Manager tab, under Record Collection Variables, you’ll see a new “Contacts from Get_Contacts” collection. Salesforce has created this automatically and tied it to the “Get Record” element you just created. Neat!
In order to send the email to each Contact we’ll need to gather all the email addresses within a single Collection Variable (emailAddresses). You’re going to use a Loop to do this.
In the Elements tab, drag a Loop onto the canvas. Configure it as shown below and click “Done” when you’re finished.
Label: Loop Contacts
API Name: Loop_Contacts
Description: Loops through the Contacts
Collection Variable: {!Get_Contacts}

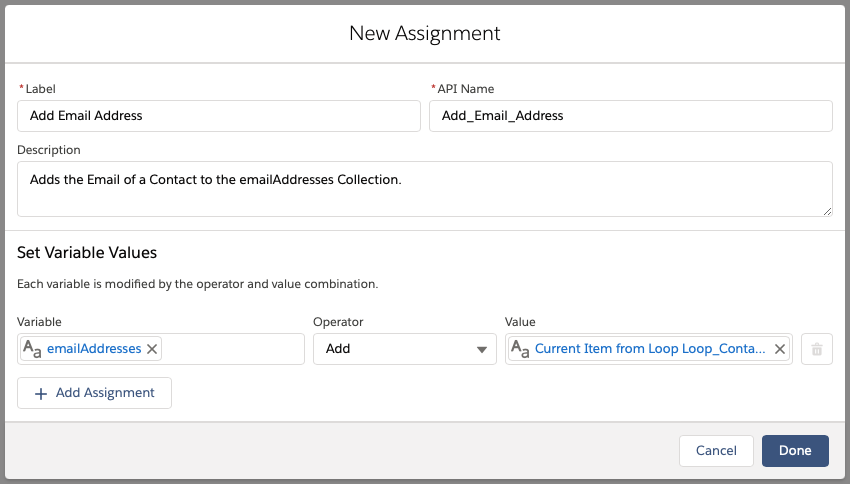
A Loop allows you to perform an action on individual variables within a collection. For each of the Contacts in the collection, we need to add their email address to the emailAddresses collection we created earlier. To do this, we’ll use an Assign element. Drag one onto the canvas and configure it as follows. When you’re finished, click “Done”.
Label: Add Email Address
API Name: Add_Email_Address
Description: Adds the Email of a Contact to the emailAddresses Collection
Variable: emailAddresses
Operator: Add
Value: Current Item from Loop Loop_Contacts.Email
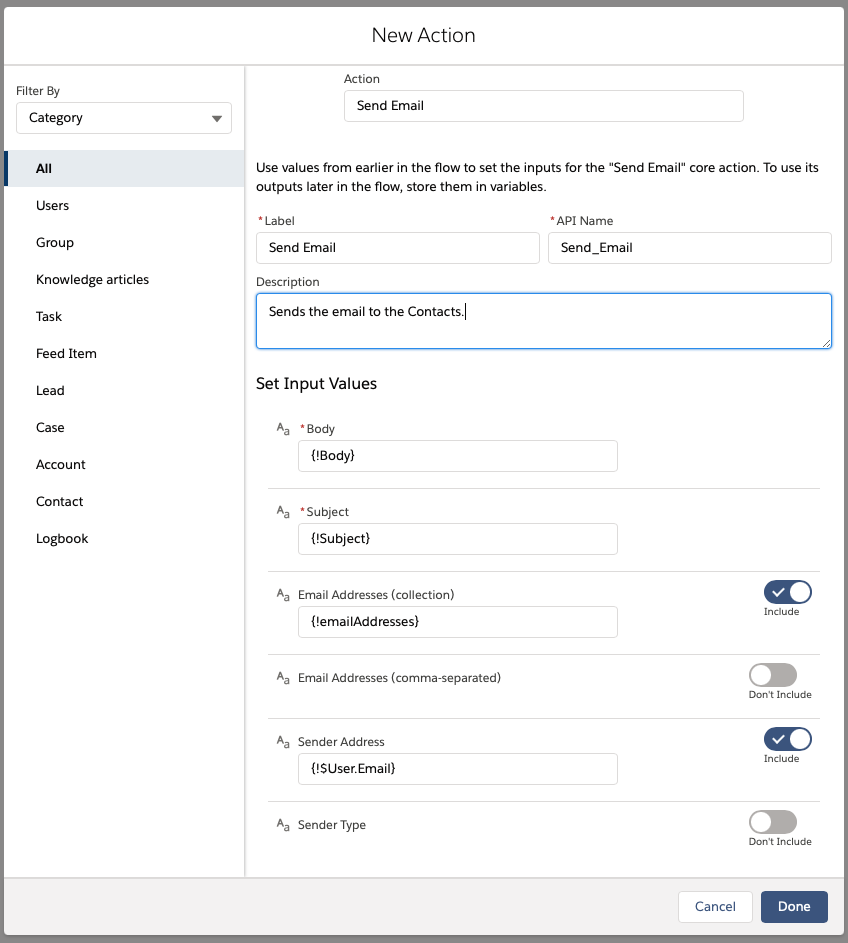
Finally, now that we have the content of the email and all the recipients ready to go, the last step is to send the email to the recipients. We can do this using an Email Action. Drag an Action element onto the canvas. In the Action field, use Send Email. Configure as below and click “Done”.
Label: Send Email
API Name: Send_Email
Description: Send the email to the Contacts
Body: {!Body}
Subject: {!Subject}
Email Addresses (collection): {!emailAddresses}
Sender Address: {!$User.Email}
Fantastic! All your elements are built and configured; it’s now time to connect it all together.
To do this, grab the circle node from the Start element and drag it to the “Get Contacts” element, and so on (chronologically). When you’re done, it should look like the image below.
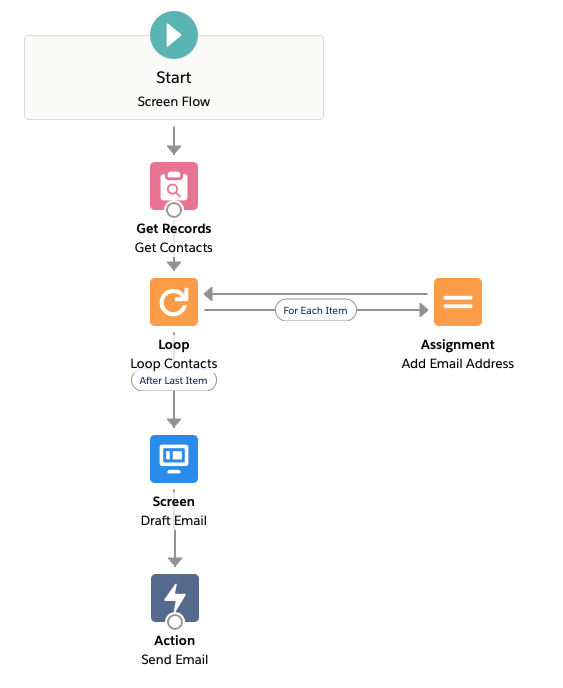
NOTE: Don’t forget to drag the Loop’s node to the Assignment element and then the Assignment back to the Loop. This closes the Loop.
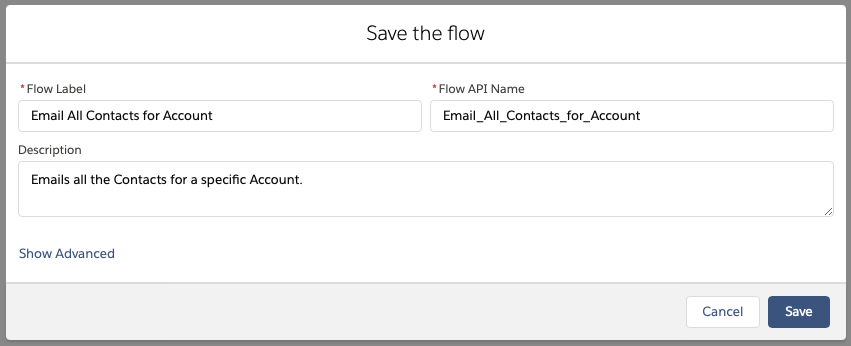
If you haven’t already, you should save your Flow at this point. The Save button is at the top-right of the Flow canvas. Don’t activate it just yet!
Take a note of the Flow Label and API Name as you’ll need them in a later step when we create our button.
Before we activate the Flow and grant our Users access to it, we need to make sure it works. We’ll create some test data together first.
Remember, we want it to email multiple Contacts related to a single Account, and no other Contacts.
We’re going to create two test Accounts, and three Contacts.
The first Account is going to be called “Positive Test”. The rest of the details you populate on this Account won’t matter.
Once you’ve created the Account, create two Contact records related to it. You will need to use real email addresses that you have access to and they need to be different for each Contact.
First Name: Test
Last Name: Contact1
Account: Positive Test
Email: any email address you own
First Name: Test
Last Name: Contact2
Account: Positive Test
Email: any email address you own, different to Test Contact1’s

Now that you’ve got your Positive Test, it’s time to create one more Account called “Negative Test” and add a third Contact to that. You’ll need access to the email address once more, and it needs to be different from the first two. The reason we’re creating this one is to make sure it ONLY sends the email to the Contacts related to a single Account, and not to all Contacts.
First Name: Test
Last Name: Contact3
Account: Negative Test
Email: any email address you own, different to Test Contact1 and Test Contact2
Once you’ve got both Positive Test and Negative Test Accounts created, and their respective Contact records, navigate back to Positive Test and copy the Record Id from the URL. We’ll use this to test the Flow. Once you’ve copied it, go back to your Flow tab.

We’re going to use Flow Builder’s debug tool to test the Flow and make sure it functions as expected. The “Debug” button is at the top-right of your page, next to the “Save” button. Make sure your Flow is saved before you continue as it will test the most recently saved version.
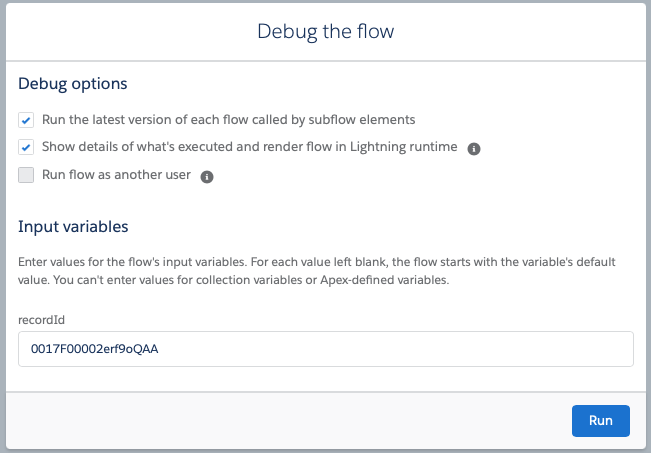
Once you’re in the debug screen, you’ll see a window similar to the image below. Paste your Account’s Record Id into the recordId variable box (if there’s no recordId box, you need to go back and ensure you made your recordId variable available for Input). When you’ve pasted it in, click “Run”.
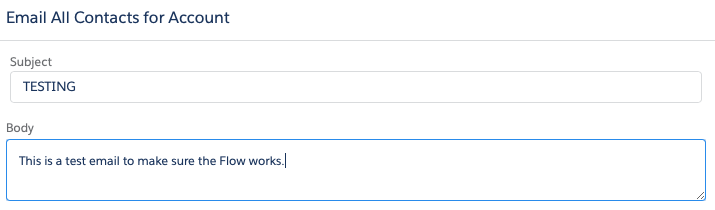
If all was created correctly, you should see Subject and Body text fields. Go ahead and populate these – this will be the content of the test email you send in the next step. When you’re done, hit “Next”.
If all has gone to plan you should see the “All done” screen. Go and check all three email inboxes associated with the test Contacts you created (including Spam folder). The email should have been received by both Contacts related to Positive Test Account, but not to the Contact related to the Negative Test Account. Bravo! Activate your Flow, and it’s time to make it accessible to the Users.
We want to give our Users the ability to call this Screen Flow from an Account record. To do this, we’ll create a new Action on the Account Object.
Head to Setup > Object Manager > Account > Buttons, Links, and Actions.

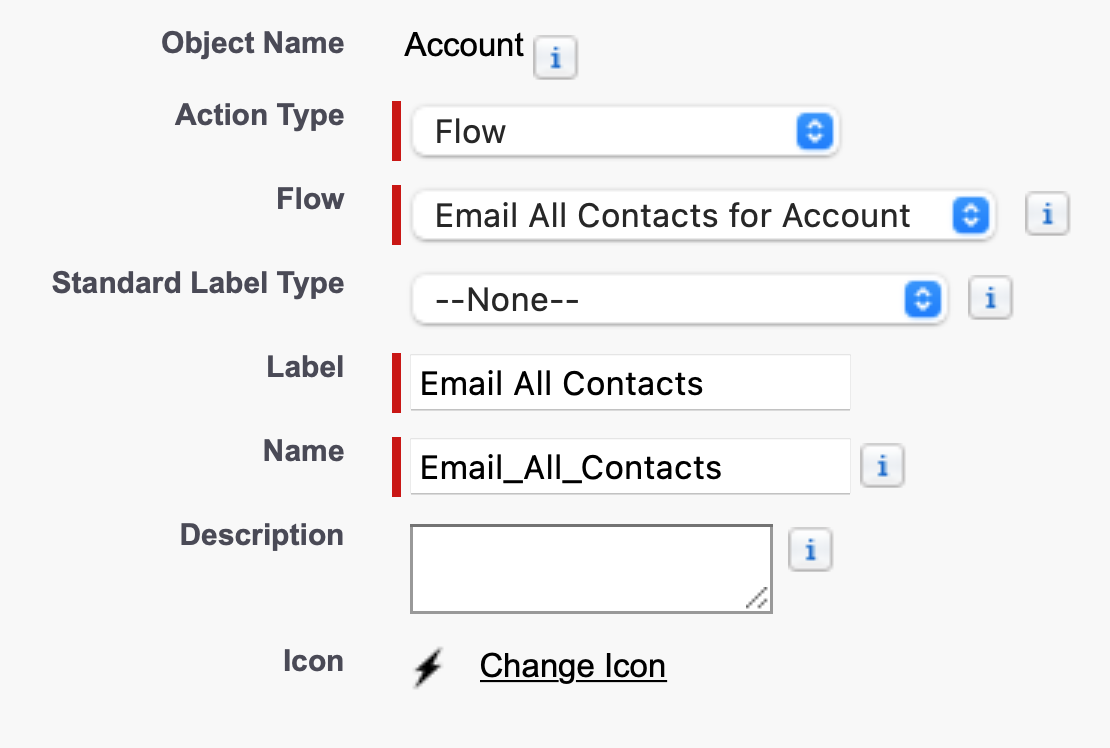
Click “New Action” at the top-right of the page. Configure your Action as follows, and click “Save” when you’re done. This is where you’ll need the name of your Flow that you created before.
Action Type: Flow
Flow: Email All Contacts for Account
Label: Email All Contacts
Name: Email_All_Contacts
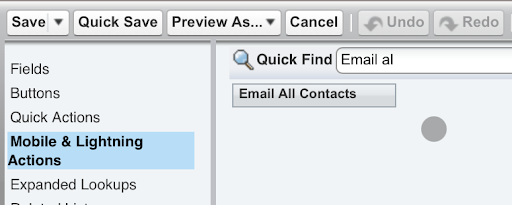
One more thing, we need to add the Action to the Page Layout. On the Account object, head over to Page Layouts, then edit the Page Layout (or multiple Page Layouts) that you want to add your Action to.
Drag your “Email All Contacts” Action from the Mobile & Lightning Actions section onto your Page Layout inside the Salesforce Mobile and Lightning Experience Actions section. Click “Save”.
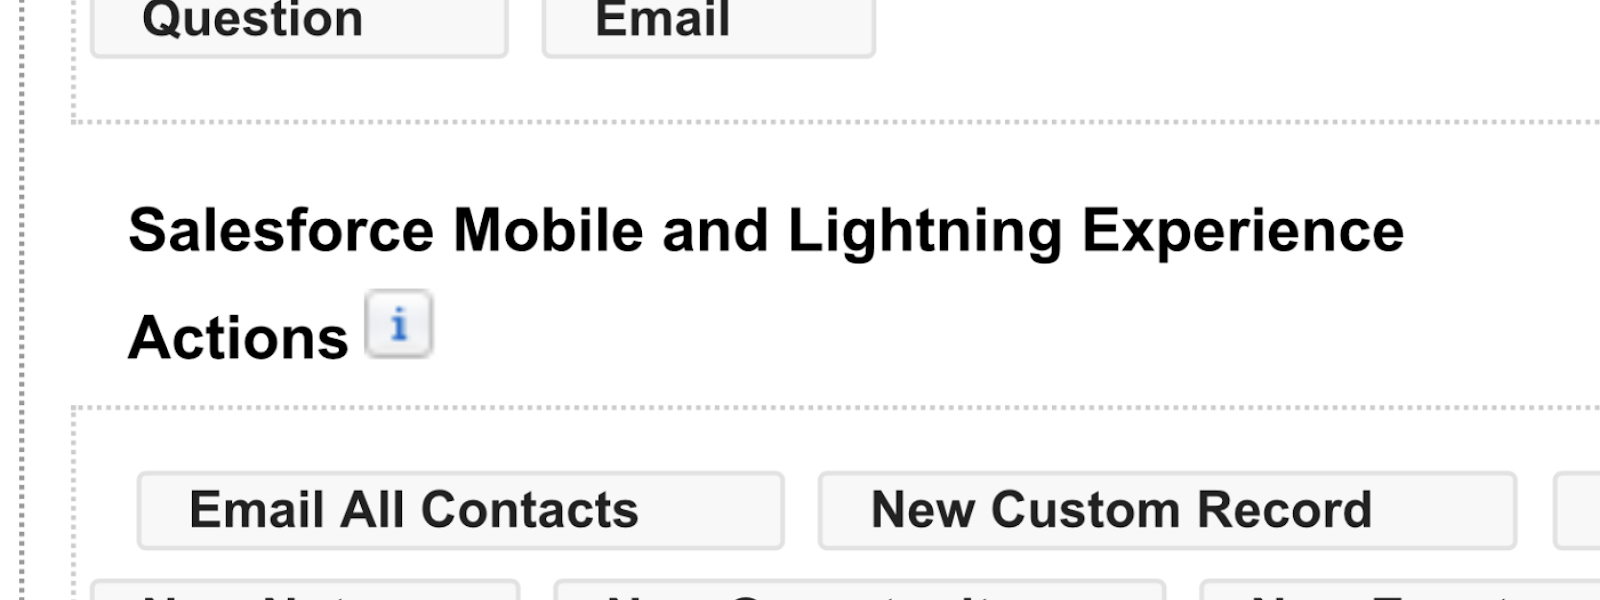
It’s a good idea to test and make sure your button shows up where expected and calls the Flow as expected too.
Congratulations! You’ve now built your first Flow using Flow builder, and you’ve made it available to your users by means of an Action on the Account Page Layout.
You can play around with customising it if you’d like. You could put a Decision element in before the Send Email element and check to see if there are any values in emailAddresses before sending, you could change the criteria for Get Contacts to ensure it only collects Contacts that have the Email field populated, and you can add another ‘error’ screen that tells the User if there are any issues.
Mastering Flow should be number one on your priorities list if you are a Salesforce Administrator. You’ll be able to configure the org for your Users in a number of powerful ways with no need to write a single line of code.
There are, of course, some best practices relating to Flow that you should follow, but that’s coming in another post.

Comments: